Window Tinting: Enhancing Comfort, Privacy, and Energy Efficiency

Window tinting has become a popular solution for improving the comfort, aesthetics, and energy efficiency of residential, commercial, and automotive spaces. From reducing glare and UV exposure to enhancing privacy and security, window tinting offers many benefits for property owners and occupants. Visit https://www.windowtintingwichita.com/ for more information.

Window Tinting

Window tinting, or window film installation, involves applying a thin, adhesive film to the interior or exterior surface of windows and glass doors. These films are formulated from polyester or polymer materials embedded with UV-blocking additives, pigments, and coatings that alter the optical properties of the glass.

Window tinting serves multiple purposes, including reducing solar heat gain, blocking harmful UV rays, enhancing privacy, and improving the overall appearance of buildings and vehicles.

Benefits of Window Tinting

  • Solar Heat Reduction: One of the primary benefits of window tinting is its ability to reduce solar heat gain and improve indoor comfort. Tinted window films block a significant portion of solar radiation, preventing excess heat from entering the interior space and reducing the need for air conditioning. This helps maintain a more consistent and comfortable indoor temperature while lowering energy consumption and utility costs.
  • UV Protection: Window tinting provides effective protection against harmful ultraviolet (UV) rays emitted by the sun. UV-blocking window films filter out up to 99% of UV radiation, preventing sun damage to furniture, flooring, artwork, and other interior furnishings. Additionally, UV protection helps reduce the risk of skin cancer, premature aging, and other adverse health effects associated with prolonged UV exposure.
  • Glare Reduction: Glare from sunlight can be a nuisance, causing eye strain, discomfort, and reduced visibility indoors. Tinted window films help minimize glare by diffusing sunlight and reducing brightness levels without obstructing outdoor views. This creates a more pleasant and visually comfortable environment for occupants, particularly in spaces with large windows or exposure to direct sunlight.
  • Enhanced Privacy: Privacy is a key consideration for homeowners, businesses, and vehicle owners alike. Window tinting offers an effective solution for enhancing privacy by obscuring the view into interior spaces without compromising natural light transmission. Privacy window films are available in various opacity levels, allowing property owners to customize their level of privacy based on their preferences and needs.
  • Security and Safety: Security window films provide an additional layer of protection against forced entry, vandalism, and accidents. These films are designed to hold glass fragments together upon impact, reducing the risk of injury from broken glass and deterring potential intruders. Security window films are commonly used in commercial buildings, storefronts, and residential properties to enhance safety and security.

Types of Window Tinting Film

  • Dyed Film: Dyed window tinting film consists of multiple layers of dyed polyester or polymer materials that absorb and block sunlight. These films are known for their rich color and aesthetic appeal, making them popular for automotive and decorative applications. Dyed films provide moderate heat and glare reduction but may be less durable and prone to fading over time.
  • Metalized Film: Metalized window tinting film incorporates metallic particles or coatings that reflect sunlight and heat away from the glass surface. These films offer superior heat rejection and UV protection compared to dyed films and provide a sleek, reflective appearance. However, metalized films may interfere with electronic devices, such as GPS or cell phone signals, and are not recommended for use on insulated or double-pane windows.
  • Carbon Film: Carbon window tinting film is formulated from carbon particles embedded in a polyester or polymer matrix. These films offer excellent heat rejection, UV protection, and durability, making them a popular choice for automotive and residential applications. Carbon films provide a matte, non-reflective finish and are less prone to fading or discoloration over time compared to dyed films.
  • Ceramic Film: Ceramic window tinting film utilizes advanced ceramic nanoparticles that block solar heat and UV radiation while maintaining optical clarity and color stability. These films offer superior heat rejection, glare reduction, and UV protection without interfering with electronic signals or obstructing visibility. Ceramic films are ideal for high-performance applications where maximum comfort and durability are desired.
  • Privacy Film: Privacy window tinting film is designed to obscure the view into interior spaces while allowing natural light transmission. These films are available in various opacity levels, ranging from translucent to opaque, and can be customized to meet specific privacy requirements. Privacy films are commonly used in residential, commercial, and automotive settings to enhance privacy without sacrificing aesthetics or natural light.

Installation Methods

Window tinting film can be installed using several methods, depending on the type of film and the complexity of the installation:

  • Adhesive Application: Adhesive application is the most common method for installing window tinting film. The film is cut to size and applied directly to the interior or exterior surface of the glass using a special adhesive backing. A squeegee or heat gun is used to remove air bubbles and ensure proper adhesion to the glass.
  • Static Cling Application: Static cling application is a temporary method for installing window tinting film without adhesive. The film is cut to size and applied to the glass using static electricity to cling to the surface. Static cling films can be easily removed and repositioned without leaving residue or damage to the glass.
  • Heat Shrink Application: Heat shrink application is commonly used for curved or contoured surfaces where traditional adhesive application may be challenging. The window tinting film is cut to size and applied to the glass using a special adhesive backing. Heat is then applied to the film using a heat gun or steamer to shrink the film and conform to the shape of the glass.
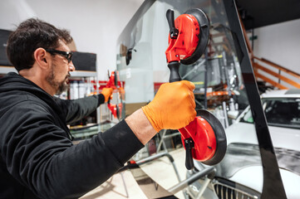
  • Professional Installation: For optimal results and long-lasting performance, professional installation by trained technicians is recommended. Professional installers have the expertise, tools, and experience necessary to ensure proper alignment, adhesion, and finishing of window tinting film. Additionally, professional installation may be required to maintain warranty coverage and ensure compliance with local regulations.

Important Considerations

Before installing window tinting film, several important considerations should be taken into account to ensure successful results:

  • Local Regulations: Check local building codes and regulations regarding window tinting to ensure compliance with applicable laws. Some jurisdictions may have restrictions on the darkness or reflectivity of window tinting film, particularly for automotive applications.
  • Glass Compatibility: Not all window tinting films are compatible with all types of glass. Consult with the manufacturer or a qualified installer to determine the suitability of the film for your specific glass substrate, including tempered, laminated, or low-e glass.
  • Warranty Coverage: Verify the warranty coverage and terms provided by the manufacturer or installer before purchasing window tinting film. Some films may come with warranties covering defects, fading, or discoloration, while others may offer additional protection against accidental damage or installation errors.
  • Maintenance Requirements: Understand the maintenance requirements and limitations of the window tinting film to ensure optimal performance and longevity. Most films can be cleaned with mild soap and water using a soft cloth or sponge, but abrasive cleaners or tools should be avoided to prevent damage to the film.
  • Professional Installation: While DIY installation is possible for some window tinting films, professional installation is recommended for larger or more complex projects, such as commercial buildings or vehicles with multiple windows. Professional installers have the training, tools, and expertise necessary to ensure proper alignment, adhesion, and finishing of the film.

Window tinting offers a multitude of benefits for enhancing comfort, privacy, and energy efficiency in residential, commercial, and automotive settings. Whether reducing solar heat gain, blocking harmful UV rays, or enhancing the aesthetics of a space, window tinting films provide a cost-effective and versatile solution for property owners and occupants. By understanding the different types of films available, installation methods, and important considerations for choosing the right tint, individuals can make informed decisions to improve the comfort, functionality, and longevity of their windows. Whether tackling a DIY project or enlisting the help of professional installers, proper planning and attention to detail are essential for achieving optimal results and maximizing the benefits of window tinting.

Tips For Replacing Windshields

Windshields are expensive, but replacing them is important for your safety. Luckily, Windshield Replacement Ocala Florida will work with your insurance company so that the cost is completely covered.

Small cracks and chips can often be filled in. Still, a replacement is necessary if the damage compromises the windshield’s integrity. This is true if it contains advanced driver assistance system sensors or cameras.

windshield repair

When replacing a windshield, you need to remove the rearview mirror and any hardware attached to it. You must also remove the wiper blades, windshield gasket, and plastic molding around the windshield. Afterward, it would be best to separate the glass from the pinch weld with a cold knife or razor. This is a time-consuming project, and it’s best to do the work in a well-lit garage or workshop with plenty of space.

If you’re a DIY enthusiast, be aware that you may spend more money on tools and materials than if you were to have your vehicle’s windshield replaced professionally. A professional will also use the correct glue and ensure the new windshield fits correctly in the window frame, reducing noise, leakage, and vibration.

Cleaning your windshield is a regular part of car maintenance. Still, it can get messy and could be better for the environment. Most of us use paper products like towels and tissues to clean our windows, but these can scratch glass and leave behind a dusty residue. Using a lint roller before applying any cleaning solution can help eliminate any loose grit or dirt that might cause damage to the glass during deep cleaning. You can also use a hydrophobic coating on your windshield, which will make rain easily slide off the glass and prevent many contaminants like wax, bug guts, and tar from bonding to the surface of the windshield.

If you have a cracked windshield, you should have it repaired immediately. Driving with a damaged windshield is a safety hazard and could lead to injury in a crash. Luckily, hairline cracks and small stone chips can be repaired with high-quality bonding agents and will restore the appearance and integrity of your windshield.

The trim on the frame that holds the windshield needs to be removed before installing a new one. This is something that many people skip doing, and this can lead to corrosion in places where it shouldn’t be. It also makes the process more difficult, as well as making it harder to get a good fit on the new windshield.

There are many different ways to do this, and people will use various tools, but the best tool is a reveal molding removal tool with a flat blade. You can find these at most auto parts stores or online, and they’re very inexpensive. It is a must-have for anyone who does glass replacement work or restoration.

When you remove the wipers, cowl panel, visors, dome light, and the lower trim pieces, you’ll need to remove four screws that hold the clips that attach to the body and keep the trim in place. Two screws on each side go into the front corners of the car (one on each corner and one on the back). These can be tricky to get out.

These clips are tricky as they’re metal, and the stainless trim sticks to them, so you can’t just pull it off. If you look closely at the clips, you can see that they have single and double “T” shaped pins that bite into the groove that the windshield fits into. The bigger ones on the bottom and top of the windshield bite onto two of these pins. You can usually feel the clips with your finger if you stick them in the groove where they’re at.

Before applying the new urethane seal to your windshield, you must cut the old one. Use a razor blade to scrape as much of the urethane as possible. It would be best to clean the area around the windshield frame with a wet sponge. This will remove any grease or dirt that might contaminate the new urethane and reduce its adhesion. After cleaning the area, wipe it down with a damp cloth and vacuum it to remove debris.

Once you’ve cleaned the area, put on your safety equipment and prepare to apply the urethane. Before you begin, read the manufacturer’s instructions on how to use the caulking gun properly. It is important to follow the directions to avoid damaging your car and causing serious problems with your windshield.

The urethane that is used to install, backlit, or delete a windshield must be strong enough to prevent the glass from detaching in a minor accident, and it must be able to withstand the weather. It should be able to withstand rain, hot temperatures, and freezing temperatures, and it should seal the windshield to prevent moisture from entering your vehicle.

It’s important to position the windshield correctly so that it isn’t too high or too low. Some cars have a special mount that holds the windshield in place, but on others, you must carefully line up the top and bottom of the glass with the frame. If the windshield is too low, it will obstruct your view while driving. If it’s too high, you could accidentally hit something or get a blowout on the road. Ideally, the windshield should be set in the center of the windshield opening.

This is the most crucial step of the entire process. If done correctly, your windshield could stay intact during driving. It’s best to leave this part of the job to professionals who are trained and equipped to perform it correctly.

Before removing the old windshield, apply a urethane primer. This is a step that Technicians often skip. When urethane is used, it creates an extremely strong bond with the frame of your vehicle and helps to prevent future cracks or breaks in your windshield.

Now that the urethane is primed, it’s time to remove the old windshield. This is done by a process called ‘pinch-weld separation.’ It involves cutting the urethane along the perimeter of your vehicle’s pinch weld with a knife or razor blade.

This is an incredibly delicate process that requires great skill and patience. Using the wrong technique can lead to a broken windshield or, even worse, rust under the new urethane installed.

If you’re a professional glass installer, you can use a special tool called an extractor that makes this process much faster and easier. This is also safer for the technician since it reduces back, neck, and shoulder strain.

Now, it’s time to install the replacement windshield. Be sure to carefully follow the manufacturer’s instructions for installation and ensure that all rubber gaskets are properly installed and tightened. Lastly, it’s important to establish the stainless trim on the edge of the windshield.

Using a high-quality adhesive for your windshield is crucial to the safety of the vehicle and its occupants. A cheap or low-quality glue will not hold the glass to the frame and can result in the windshield falling off. This is not only dangerous for the driver and passengers but also increases the risk of an accident, which is something that any car service company would like to avoid.

To make sure the new windshield is secured in place, a body shop will use an auto glass urethane seal. This is a black, medium-viscosity material that can be applied directly to the rubber gasket with a caulking gun. It is usually fast-curing and does not require heating to set. It also does not have any unpleasant odors.

When using the seal, it is important to follow the instructions to the letter. This is because improper urethane application can cause many problems, including leaks, bubbles, or even permanent damage to the frame. To ensure the urethane is applied correctly, it’s best to visit an auto glass professional.

The experts will ensure the area is free of grease, dirt, and other contaminants that could affect the bonding process. They will also ensure the foam dam and the glass are properly aligned. A visual inspection and pressure do this.

A urethane windshield sealant is ten times stronger than old traditional adhesives. It also has less elongation and is less flexible, resulting in greater rigidity and overall vehicle stability. This makes it the superior choice for your automobile.

How to Get Serious About Car Interior Detailing

A car’s interior surfaces can suffer from excess wear and tear without proper care. It also impacts the resale value of your vehicle.

Cleaning and disinfecting commonly touched surfaces in the car, such as the steering wheel, door panels, and cupholders, is a crucial aspect of detailing. For more information visit Perth Car Detailing.

Detailers use odor-elimination chemicals to leave the interior of your car fresh and clean. Other procedures include headlight restoration, which helps improve visibility and safety.

  1. Vacuum

If you want to get serious about detailing your car, consider investing in a high-end vacuum cleaner with various attachments for tight spaces and hard-to-reach areas. These special attachments typically feature soft bristles that are safe for delicate surfaces, such as the dashboard and air vents.

Start by vacuuming the seats, carpets, and floor mats. Make sure you remove the seat covers first, then use the crevice tool to clean the edges of the seats, including the seams. You can also use the crevice tool to vacuum hidden corners and difficult-to-reach spots, such as between the back seats.

Vacuuming removes loose dirt and debris, making the next steps much easier. It’s also a great way to eliminate odors and make your car feel fresh and clean again.

After vacuuming, use a dusting brush to loosen dirt and other debris from the dashboard, center console, door panels, cupholders, and other hard-to-reach areas. You can then vacuum the area again to remove any loose debris. This step is essential to prevent greasy buildup and stains on these surfaces, as well as to keep the air in your vehicle clean.

  1. Clean Upholstery

Whether you have cloth or leather seats, regular cleaning is essential to keep your car looking and smelling fresh. It can remove stains, prevent future stains, and help extend the life of your upholstery. Vacuuming and shampooing are standard, and the use of spray-on and foam-cleaning chemicals is also common.

If you have a grease stain from the drive-thru coffee shop, table salt will be a mild abrasive on cloth seats. Sprinkle it over the seat and let it sit for a few minutes before rubbing it with a clean towel. It will dissolve the grease and leave a light powder behind, which can be vacuumed away.

Some cleaning products leave behind residue that can attract future soils and re-stain your seat. Instead, use a cleaning product like Power Out Upholstery Cleaner. It dries to a powder, absorbing the soil rather than leaving it behind and making it easier to remove the dirt next time you need to wash your seats. It also eliminates odors and leaves your vehicle with a fresh scent.

  1. Clean Seatbelts

As you know, seat belts can get dirty over time. They often have food or drink spills, dirt, and other grime from passengers riding in the back, and even the occasional accident.

Cleaning seat belts is more involved than just using a vacuum, but it can still be done relatively quickly and easily with the right tools. First, unbuckle the belt and pull it out of its holder. You’ll want to take special care not to yank it hard, as this could damage the more delicate system that holds the belt in place.

Next, you’ll need to grab a clamp and some cleaner to keep the belt from retracting while you clean it. It’s best to use something stronger than a paperclip, so the kind of clip used for stacks of paper or the ChicClip that people often use to hold bags of potato chips works well. Once the belt has been cleaned, it should dry completely before reinstalling and rewinding it into the system.

  1. Clean Leather

A professional detailing service will have premium tools and supplies that make it easier to clean the seats and other leather areas of the vehicle. These products may include a special cleaner that is compatible with different leather colors and textures, as well as a soft-bristled brush to help remove tough stains.

It’s important to follow the instructions on the product before using it. Some products require that you apply them with a microfiber towel or applicator pad rather than directly to the seat material, which helps avoid overspray and protects the fabric. It’s also recommended to test the cleaning solution on an inconspicuous seat area before applying it to a whole surface.

In addition to the interior, a thorough car detailing process includes headlight restoration, which makes your headlights brighter and clearer for improved visibility. It also has chrome polishing and door jamb cleaning, which can help your vehicle look brand new. These finishing touches make a big difference in how your vehicle looks and feels, which is why they’re often included in the price of a full detail.

  1. Clean Dashboard

The dashboard can be one of the dirtiest parts of your car. First, vacuum it to get rid of any loose debris. Then, wipe it down with a microfiber cloth or rag soaked in a cleaner for your vehicle’s interior surfaces. Different surfaces require different cleaning solutions, so do a spot test before using any product on your dash.

Besides cleaning the dashboard, you should also clean any other plastic interior parts and screens like the radio, outfit shift, steering wheel, and vents. If you have difficulty cleaning these areas, use a soft-bristled brush and a vacuum cleaner with a long hose attachment to reach tight crevices and corners.

Lastly, wipe down the steering wheel and gear shift knobs with disinfecting wipes to kill germs and bacteria. Do this daily to keep these high-touch surfaces in good condition. You can also apply a protective coating to your dash to help it resist water, sun damage, and fading. A few coats of wax every so often can go a long way in keeping your dash looking new.

  1. Clean Door Panels

Door panels can get dirty quickly, so it’s important to keep them clean. Use a cleaner formulated for plastic, vinyl, or leather surfaces to wipe them down, and clean hard-to-reach areas like storage pockets and armrests. Before using a cleaning solution, spot-test it on an inconspicuous panel area to ensure it won’t discolor the material. After you’ve cleaned the panel, dry it with a microfiber cloth or leave it open to air-dry any lingering moisture.

Remember to check the door drains and wipe down the rubber doorjambs, too. These are some of the first things that people see when they enter your car, so they need to be clean and free of debris.

  1. Clean Steering Wheel

Your steering wheel is one of the most commonly touched parts of your car. As a result, it can quickly accumulate dirt and grime that makes it sticky to the touch or look dirty and discolored. It can also become a breeding ground for bacteria and viruses.

Thankfully, the steering wheel can be cleaned using cleaning solutions that are easy on leather and tough on germs. It’s important to follow the recommended application methods and drying techniques to avoid damage or streaking.

To clean a leather steering wheel, first, use a leather cleaner to loosen the stuck-on dirt. Then, use a clean cloth to wipe away the dirt and residue. After you’re done, use a non-sticky leather protectant to prevent the dirt and grime from coming back.

If your steering wheel is made of perforated leather, you can apply a protective layer of oil to keep it soft and flexible. Dab a little protectant or oil onto a clean cloth and gently rub the surface of the steering wheel, using a circular motion to bluff out slight scratches.

  1. Clean Cupholders

A regular vacuum cleaner isn’t strong enough to get into nooks and crannies, but detailers have access to powerful equipment that can. For instance, a steam cleaner breaks down oil and dried spills quickly and easily. In addition, it disinfects surfaces frequently touched by passengers, including the steering wheel and door panels.

Stubborn stains can be removed through detailed cleaning procedures, such as shampooing and conditioning the upholstery and leather seats. These services eliminate foul odors, improving the overall air quality of the vehicle. Finally, detailers clean the windows and mirrors to remove any smudges or streaks that may reduce visibility while driving.

In addition to improving the appearance and comfort of the vehicle, car interior detailing can also help preserve the resale value. Regular maintenance by a professional car detailer will ensure your vehicle’s interior looks new and attracts buyers when it is time to sell. Contact a local auto detailing service for more information about their rates and services. Then, you can choose the package that best meets your needs and budget.