Windshields are expensive, but replacing them is important for your safety. Luckily, Windshield Replacement Ocala Florida will work with your insurance company so that the cost is completely covered.
Small cracks and chips can often be filled in. Still, a replacement is necessary if the damage compromises the windshield’s integrity. This is true if it contains advanced driver assistance system sensors or cameras.
When replacing a windshield, you need to remove the rearview mirror and any hardware attached to it. You must also remove the wiper blades, windshield gasket, and plastic molding around the windshield. Afterward, it would be best to separate the glass from the pinch weld with a cold knife or razor. This is a time-consuming project, and it’s best to do the work in a well-lit garage or workshop with plenty of space.
If you’re a DIY enthusiast, be aware that you may spend more money on tools and materials than if you were to have your vehicle’s windshield replaced professionally. A professional will also use the correct glue and ensure the new windshield fits correctly in the window frame, reducing noise, leakage, and vibration.
Cleaning your windshield is a regular part of car maintenance. Still, it can get messy and could be better for the environment. Most of us use paper products like towels and tissues to clean our windows, but these can scratch glass and leave behind a dusty residue. Using a lint roller before applying any cleaning solution can help eliminate any loose grit or dirt that might cause damage to the glass during deep cleaning. You can also use a hydrophobic coating on your windshield, which will make rain easily slide off the glass and prevent many contaminants like wax, bug guts, and tar from bonding to the surface of the windshield.
If you have a cracked windshield, you should have it repaired immediately. Driving with a damaged windshield is a safety hazard and could lead to injury in a crash. Luckily, hairline cracks and small stone chips can be repaired with high-quality bonding agents and will restore the appearance and integrity of your windshield.
The trim on the frame that holds the windshield needs to be removed before installing a new one. This is something that many people skip doing, and this can lead to corrosion in places where it shouldn’t be. It also makes the process more difficult, as well as making it harder to get a good fit on the new windshield.
There are many different ways to do this, and people will use various tools, but the best tool is a reveal molding removal tool with a flat blade. You can find these at most auto parts stores or online, and they’re very inexpensive. It is a must-have for anyone who does glass replacement work or restoration.
When you remove the wipers, cowl panel, visors, dome light, and the lower trim pieces, you’ll need to remove four screws that hold the clips that attach to the body and keep the trim in place. Two screws on each side go into the front corners of the car (one on each corner and one on the back). These can be tricky to get out.
These clips are tricky as they’re metal, and the stainless trim sticks to them, so you can’t just pull it off. If you look closely at the clips, you can see that they have single and double “T” shaped pins that bite into the groove that the windshield fits into. The bigger ones on the bottom and top of the windshield bite onto two of these pins. You can usually feel the clips with your finger if you stick them in the groove where they’re at.
Before applying the new urethane seal to your windshield, you must cut the old one. Use a razor blade to scrape as much of the urethane as possible. It would be best to clean the area around the windshield frame with a wet sponge. This will remove any grease or dirt that might contaminate the new urethane and reduce its adhesion. After cleaning the area, wipe it down with a damp cloth and vacuum it to remove debris.
Once you’ve cleaned the area, put on your safety equipment and prepare to apply the urethane. Before you begin, read the manufacturer’s instructions on how to use the caulking gun properly. It is important to follow the directions to avoid damaging your car and causing serious problems with your windshield.
The urethane that is used to install, backlit, or delete a windshield must be strong enough to prevent the glass from detaching in a minor accident, and it must be able to withstand the weather. It should be able to withstand rain, hot temperatures, and freezing temperatures, and it should seal the windshield to prevent moisture from entering your vehicle.
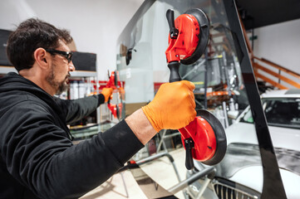
It’s important to position the windshield correctly so that it isn’t too high or too low. Some cars have a special mount that holds the windshield in place, but on others, you must carefully line up the top and bottom of the glass with the frame. If the windshield is too low, it will obstruct your view while driving. If it’s too high, you could accidentally hit something or get a blowout on the road. Ideally, the windshield should be set in the center of the windshield opening.
This is the most crucial step of the entire process. If done correctly, your windshield could stay intact during driving. It’s best to leave this part of the job to professionals who are trained and equipped to perform it correctly.
Before removing the old windshield, apply a urethane primer. This is a step that Technicians often skip. When urethane is used, it creates an extremely strong bond with the frame of your vehicle and helps to prevent future cracks or breaks in your windshield.
Now that the urethane is primed, it’s time to remove the old windshield. This is done by a process called ‘pinch-weld separation.’ It involves cutting the urethane along the perimeter of your vehicle’s pinch weld with a knife or razor blade.
This is an incredibly delicate process that requires great skill and patience. Using the wrong technique can lead to a broken windshield or, even worse, rust under the new urethane installed.
If you’re a professional glass installer, you can use a special tool called an extractor that makes this process much faster and easier. This is also safer for the technician since it reduces back, neck, and shoulder strain.
Now, it’s time to install the replacement windshield. Be sure to carefully follow the manufacturer’s instructions for installation and ensure that all rubber gaskets are properly installed and tightened. Lastly, it’s important to establish the stainless trim on the edge of the windshield.
Using a high-quality adhesive for your windshield is crucial to the safety of the vehicle and its occupants. A cheap or low-quality glue will not hold the glass to the frame and can result in the windshield falling off. This is not only dangerous for the driver and passengers but also increases the risk of an accident, which is something that any car service company would like to avoid.
To make sure the new windshield is secured in place, a body shop will use an auto glass urethane seal. This is a black, medium-viscosity material that can be applied directly to the rubber gasket with a caulking gun. It is usually fast-curing and does not require heating to set. It also does not have any unpleasant odors.
When using the seal, it is important to follow the instructions to the letter. This is because improper urethane application can cause many problems, including leaks, bubbles, or even permanent damage to the frame. To ensure the urethane is applied correctly, it’s best to visit an auto glass professional.
The experts will ensure the area is free of grease, dirt, and other contaminants that could affect the bonding process. They will also ensure the foam dam and the glass are properly aligned. A visual inspection and pressure do this.
A urethane windshield sealant is ten times stronger than old traditional adhesives. It also has less elongation and is less flexible, resulting in greater rigidity and overall vehicle stability. This makes it the superior choice for your automobile.